Tips & Hints For Using Ranger Distress Inks
What do you do when you want a specific color of lace or ribbon for your scrapbook page but you don't have time to go out to a shop? The answer lies in distress ink. Read on to find out more.
Scrapbooking with Distress Inks: Hints and
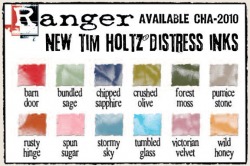
There are many type of ink on the market for use in stamping and scrapbooking. One of my favorites is Tim Holtz Distress ink, it comes in a wonderful set of colors and is a little different to anything else on the market, they are dye based inks which have been especially formulated to give a heritage or worn look to your pages. If you're not into heritage, you can take the modern view and call it grunge. Their major feature, apart from the lovely colors is that they stay wetter than other dye based inks, allowing you to blend and shade on both paper and photos.
Most of us don't plan scrapbooking - we grab the chance to get some done when we can, so it can be annoying to find you want something for a layout but don't have it to hand in the right color. Distress Inks provide a great solution. If you buy fibers, ribbons, lace etc in neutral colors you can tint them with the ink pads. Just pull the pad over them, gently if you want them to be pale, the harder you press the deeper the color.
I love to make pages embellished with Prima type flowers. If you buy these in cream, just a small tap with an ink pad will color the raised pieces, you can then go round the edge of the petals with the same color or a darker one, it's entirely up to you. For a more vivid look, hold the flower down on your mat with tweezers, and give it a good rub with the ink pad. When dry the result is really beautiful, no smears, and all you have to do is add your own special touch for the center, perhaps a dab of glue and some glitter or a lovely pearly brad. Of course you can use a much darker pad to go round the edges for a little definition or add some Perfect Pearls to some of them while they are still wet for a different look. The best thing is that you can have any color of flower you need as long as you have the right ink.
While you have your inks out you can make some wonderful backgrounds for cards. Using glossy card stock and your chosen Distress ink, run a brayer over your ink pad, always with a forward motion. Do this six or seven times, more if you find that it is not loaded enough. Now run it several times over your glossy card and this time you can go backward and forward. Keep going until you are happy with it, leave it to dry, then you can either stamp on to it or trim it with fancy scissors and add a topper or a piece of decoupage, before adding it to your card. Do several of these at a time; they will stand you in good stead when you are asked to make a card in a hurry, and of course it means you can can always have the color you need, rather than just the color that is available.
There are so many different things you can do with Distress ink I think of it now as another essential, tucked in my tool box right next to the scissors.
You can learn more about Tim Holtz Distress Inks at Dinglefoot.com where we sell lots of inks and other scrapbooking supplies.
Scrapbooking with Distress Inks: Hints and
There are many type of ink on the market for use in stamping and scrapbooking. One of my favorites is Tim Holtz Distress ink, it comes in a wonderful set of colors and is a little different to anything else on the market, they are dye based inks which have been especially formulated to give a heritage or worn look to your pages. If you're not into heritage, you can take the modern view and call it grunge. Their major feature, apart from the lovely colors is that they stay wetter than other dye based inks, allowing you to blend and shade on both paper and photos.
Most of us don't plan scrapbooking - we grab the chance to get some done when we can, so it can be annoying to find you want something for a layout but don't have it to hand in the right color. Distress Inks provide a great solution. If you buy fibers, ribbons, lace etc in neutral colors you can tint them with the ink pads. Just pull the pad over them, gently if you want them to be pale, the harder you press the deeper the color.
I love to make pages embellished with Prima type flowers. If you buy these in cream, just a small tap with an ink pad will color the raised pieces, you can then go round the edge of the petals with the same color or a darker one, it's entirely up to you. For a more vivid look, hold the flower down on your mat with tweezers, and give it a good rub with the ink pad. When dry the result is really beautiful, no smears, and all you have to do is add your own special touch for the center, perhaps a dab of glue and some glitter or a lovely pearly brad. Of course you can use a much darker pad to go round the edges for a little definition or add some Perfect Pearls to some of them while they are still wet for a different look. The best thing is that you can have any color of flower you need as long as you have the right ink.
While you have your inks out you can make some wonderful backgrounds for cards. Using glossy card stock and your chosen Distress ink, run a brayer over your ink pad, always with a forward motion. Do this six or seven times, more if you find that it is not loaded enough. Now run it several times over your glossy card and this time you can go backward and forward. Keep going until you are happy with it, leave it to dry, then you can either stamp on to it or trim it with fancy scissors and add a topper or a piece of decoupage, before adding it to your card. Do several of these at a time; they will stand you in good stead when you are asked to make a card in a hurry, and of course it means you can can always have the color you need, rather than just the color that is available.
There are so many different things you can do with Distress ink I think of it now as another essential, tucked in my tool box right next to the scissors.
You can learn more about Tim Holtz Distress Inks at Dinglefoot.com where we sell lots of inks and other scrapbooking supplies.
